Quick answer: On iPhone, go to Settings, then Cellular, then Cellular Data Options, and turn off Low Data Mode (on 5G iPhones it sits under Data Mode). On Android, go to Settings, then Network and internet, then Data Saver, and turn off Use Data Saver. On Samsung phones the path is Settings, then Connections, then Data usage, then Data saver. The change takes effect at once.
Related reading: Mac charging check
First, make sure you are turning off the right thing
“Data saving” is not one switch. It is a family of features with similar names on different devices, and turning off the wrong one will not fix your problem. On iPhone, the system feature is called Low Data Mode, and it lives in both the cellular settings and the Wi-Fi settings, separately for each network. On Android, the system feature is called Data Saver. On top of those, individual apps have their own data saver modes: browsers, video apps, and social apps all offer their own versions, with their own toggles.
This guide covers the system switches first, because those are what most people mean when they say data saving is slowing their phone down. Then it covers the app-level switches that often survive after the system switch is off, which is why many people turn Data Saver off and then wonder why nothing changed. If you work through both layers, you will actually get full-speed behaviour back, instead of half of it.
Before you turn anything off, it is worth asking why it was on. Data saving features do not usually switch themselves on by accident, though they can arrive switched on as part of a carrier setup, a battery saving mode, or a well-meaning friend’s help. If your plan is small and you turn everything off without a plan, your data will burn faster, and you may end up with a bill that makes you wish you had left it alone. The last section of this guide covers how to turn things off safely, with a safety net, so read that before you start flipping toggles if your plan is tight.
Related reading: iPhone battery replacement
What data saving actually does to your phone
Data Saver on Android restricts background data use for apps. When it is on, most apps can only use mobile data in the foreground, and background sync, automatic updates, and preloading are held back until Wi-Fi. Some apps also lower image and video quality while it is on. It does not block mobile data entirely, and it does not apply on Wi-Fi at all: once you connect to Wi-Fi, the restrictions lift automatically.
Low Data Mode on iPhone does a similar job with Apple wording. Apple describes it as pausing automatic updates and background tasks when the phone is not on Wi-Fi, reducing streaming quality, and pausing services like iCloud Photos sync. On 5G iPhones there is also a Data Mode choice between Low Data Mode, Standard, and Allow More Data on 5G, which is the opposite end of the scale: it lets the phone use more data for higher quality and faster features.
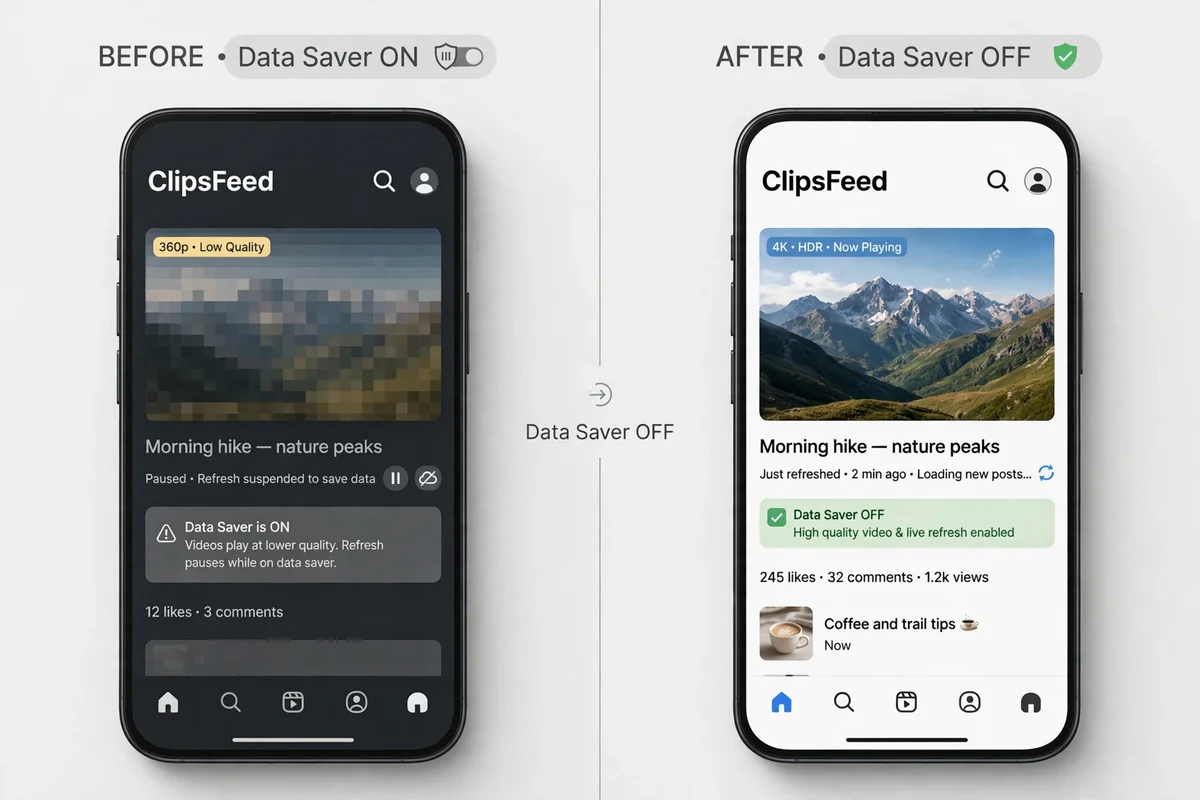
The symptoms of data saving being on are easy to recognise once you know them. Videos look soft even on a fast connection. Photos take a moment to sharpen. Email and chat messages arrive in batches instead of instantly. App updates wait until Wi-Fi. Backups pause. Feeds refresh less often. None of this is a fault. It is the feature working as designed, trading speed and freshness for data. If those symptoms match your phone, you have probably found the culprit, and turning the feature off should fix them within minutes.
Related reading: connecting AirPods to a laptop
Turn off Low Data Mode on iPhone, step by step
For a cellular connection, open Settings, then tap Cellular. If your iPhone uses the regional name, tap Mobile Service instead. If you have two lines, tap the line you want to change first, because Low Data Mode is set per line, not for the whole phone at once.
On a 4G or LTE iPhone, tap Cellular Data Options, then turn off Low Data Mode. On a 5G iPhone, tap Cellular Data Options, then Data Mode, then choose Standard instead of Low Data Mode. Standard is the middle option and the normal behaviour for most people. Allow More Data on 5G is the high-data option, and you should only pick it if you have a large or unlimited plan and you want the highest quality everywhere.
Wi-Fi has its own Low Data Mode, set per network, and this is the one people forget. Open Settings, then Wi-Fi, then tap the small info icon next to the network you are on, and turn off Low Data Mode for that network. If you only turn off the cellular version and your home Wi-Fi network still has Low Data Mode on, your phone will still behave in a restricted way at home, and you will think the fix did not work. Check both places.
After turning it off, test with something obvious. Open a video app and play a video, or open a photo-heavy feed and watch images sharpen quickly. If quality returns at once, the switch was the cause. If nothing changes, an app-level data saver is probably still on, and the next sections cover those.
Related reading: cancelling a music subscription
Turn off Data Saver on Android, step by step
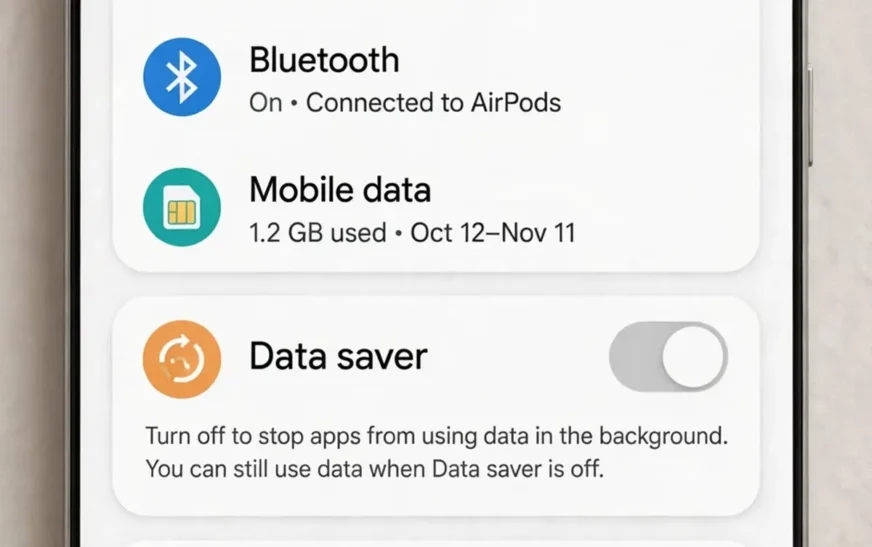
On a Pixel and on most Android phones, open Settings, then tap Network and internet, then tap Data Saver, then turn off Use Data Saver. That is the whole job for stock Android, and the change takes effect at once. Background data access returns to normal, and apps can sync and refresh as they did before.
On a Samsung Galaxy phone, the path is different because Samsung organises settings differently. Open Settings, then tap Connections, then tap Data usage, then tap Data saver, then turn off the switch. On some Samsung models there is also a separate Ultra data saving mode in some regions, and if your phone has it, you need to turn that off separately under the same area, because it is a stronger restriction than the standard Data Saver.
On other makers’ phones, the wording varies, but the shape is the same: Settings, then something about network, connections, or data usage, then Data Saver. If you cannot find it, use the search bar at the top of Settings and type “data saver”. That search works on most Android phones and takes you straight to the toggle, whatever menu it lives under. Some phones also put a Data Saver button in Quick Settings, the panel you get by swiping down twice from the top of the screen, and that button toggles the same feature.
After turning it off, check the same way as on iPhone: play a video, open a photo feed, and see whether quality and freshness return. If they do, you are done with the system layer. If they do not, keep reading, because an app-level saver is likely still in play.
Related reading: slow connection fixes
The middle option: keep Data Saver on, but free one app
You do not have to choose between all-on and all-off. Both systems let you keep data saving on for most apps while freeing the one or two apps that need full speed. This is often the best answer, because it fixes the annoying app without opening the floodgates for everything else.
On Android, open Data Saver settings and look for Unrestricted data, or on Samsung, the option labelled to allow apps to use data while Data Saver is on. Turn on the apps you want to exempt. Those apps will then use mobile data normally, including in the background, while every other app stays restricted. Video calling apps, work chat apps, and navigation apps are the usual candidates for exemption, because they suffer most from delayed sync.
On iPhone there is no single exemption list for Low Data Mode, but you can achieve a similar result per app. For the app that matters, check its own settings for a data saver or quality option and set it to full quality, and make sure Background App Refresh is on for that app under Settings then General then Background App Refresh. That does not fully override Low Data Mode for that app, but in practice it restores most of the behaviour people miss, while the system restriction still protects the rest of the phone.
This middle option is also the safest way to test. Free one app, use it for a day, and see whether your data use jumps. If it barely moves, the app was never the problem, and you can free more apps with confidence. If it jumps a lot, you have learned something valuable about that app’s appetite before you opened the gates for everything.
Related reading: setting up a second screen
App-level data savers that survive the system switch
Browsers are the biggest culprit here. Many mobile browsers have a Lite mode, data saver mode, or similar feature that compresses pages and lowers image quality. That feature lives inside the browser’s own settings, not in the phone’s settings, so turning off the system Data Saver does not turn it off. Open your browser’s settings, look for data saver or lite mode, and turn it off if you want full-quality pages.
Video apps are next. Streaming apps have their own quality and data saver settings, and many default to a data-saving quality on mobile connections regardless of the system switch. Open each video app’s settings, look for playback quality or mobile data options, and set it to the quality you actually want on mobile. Social apps are similar: many have a data saver mode, an autoplay setting, and a setting for uploading and downloading media quality, all of which survive a system-level change.
Cloud and photo apps deserve a check too. Photo backup apps often have a setting to upload on mobile data or Wi-Fi only, and a setting for upload quality. If your photos look soft or uploads stall, that setting, not the system switch, may be the cause. The same applies to app stores: automatic app updates over mobile data are usually controlled in the store’s own settings, and turning off the system saver does not change them.
The rule is simple: if you turned off the system switch and one app still behaves in a restricted way, that app has its own switch. Find it in the app’s settings, turn it off, and test again. Work through your most-used apps one by one, and you will find the stragglers quickly.
Related reading: phone fault fixes
What changes the moment you turn it off
Expect three changes at once. First, quality returns. Videos play at higher quality, photos sharpen faster, and pages load full images instead of compressed versions. Second, freshness returns. Email, chat, and feeds update promptly in the background instead of waiting for you to open the app or reach Wi-Fi. Third, data use rises. How much it rises depends on how you use the phone, but for a heavy video or social user it can be several gigabytes a month, which is why the safety net in the next section matters.
Expect one thing not to change: your plan. Turning off data saving does not change your allowance, your carrier, or your billing. It only changes how fast your phone uses the allowance you already have. That is why the decision is really about pacing, not about permission. You are choosing to spend the same allowance faster, in exchange for better quality and freshness now.
Also expect some apps to take a little while to catch up. An app that has been holding back downloads may suddenly fetch a backlog of updates, photos, or feed content in the first hour after you turn the saver off. That burst is normal, and it settles down. If you are on a tight plan, turning the saver off on Wi-Fi first, letting the backlog clear on Wi-Fi, and then going mobile is a neat trick to avoid that burst landing on your mobile allowance.
Related reading: Chromebook screen tips
Turn it off safely: the safety net
If your plan is generous or unlimited, just turn it off and enjoy the difference. If your plan is tight, use a safety net instead of going cold turkey. First, check your current usage and your remaining allowance, so you know how much headroom you actually have. Then turn off the system saver, but keep per-app controls in place for the worst offenders, using the exemption approach in reverse: leave video and social apps restricted, and free only the apps that were actually annoying you.
Second, set a usage alert. Most carriers let you set alerts at percentages of your allowance, and your phone can show usage too. An alert at 80 percent turns a surprise bill into a warning you can act on, by turning the saver back on for the rest of the month. That is a much better outcome than discovering the overage after the fact.
Third, run a one-week test. Turn the saver off, use the phone normally for a week, and check usage at the end of the week against a normal week. If the increase is small, keep it off. If the increase is large, you now know exactly what full-speed behaviour costs you, and you can decide with a real number instead of a fear. A test week beats a year of guessing.
Finally, remember you can turn it back on. Data saving is not a one-way door. If you turn it off, burn through data faster than expected, and regret it, turning it back on restores the old behaviour at once. There is no penalty for experimenting, as long as you watch the meter while you do it.
Related reading: browser productivity add-ons
When you should leave data saving on
There are times when leaving it on is the right call, and it is worth saying so plainly. If you are roaming, leave it on, because roaming data is expensive and often billed differently, and a restricted phone is far cheaper than a full-speed one abroad. If you are in the last week of your billing month and close to your allowance, leave it on until the month resets. If you are on a small plan and you mostly use the phone for messaging and calls, the quality loss from data saving is barely noticeable, and the saving is real.
Data saving also makes sense as a default for children’s phones, work phones on shared plans, and any phone where the bill matters more than video quality. There is no shame in it. It is a tool, not a punishment, and the goal is to use it when it helps and turn it off when it gets in the way, not to treat either state as permanent.
The same logic applies to battery saving modes, which sometimes switch data saving on as a side effect. If your phone suddenly behaves in a restricted way after you turned on a battery saver, check whether the battery mode also enabled a data restriction, and turn that part off separately if you want full data behaviour with battery saving kept on.
Related reading: Galaxy Watch 8 Classic review
Troubleshooting: I turned it off and nothing changed
Start by checking whether you turned off the right switch. On iPhone, check both the cellular and the Wi-Fi Low Data Mode settings, because they are separate. On Android, check whether a Samsung-style Ultra data saving mode is also on, and whether a Quick Settings Data Saver button is still active, since that button controls the same feature and can re-enable it.
Next, check app-level savers, as described above. Browsers, video apps, and social apps all have their own switches, and one of those is the most common reason for “nothing changed” after a system change. Work through your top three apps and check each one’s quality and data settings.
Then check for a carrier or plan restriction. Some plans throttle video quality or speed regardless of your phone’s settings, and no phone toggle can override a carrier-side restriction. If videos stay soft on mobile data but look sharp on Wi-Fi, and every phone and app setting is off, a carrier video throttle is a real possibility, and a call to the carrier is the next step.
Finally, restart the phone. It sounds like a cliché, but settings changes sometimes need a restart to take full effect, especially after toggling system-level features. Restart, test a video, and if quality is still restricted, work back through the checklist with fresh eyes. One missed toggle is usually the answer.
Related reading: fitness watch face-off
FAQ
How do I turn off data saving on iPhone?
Go to Settings, then Cellular, then Cellular Data Options, and turn off Low Data Mode. On 5G iPhones, choose Standard under Data Mode instead. Also check Wi-Fi Low Data Mode for each network under Settings, then Wi-Fi, then the network’s info icon.
How do I turn off Data Saver on Android?
Go to Settings, then Network and internet, then Data Saver, and turn off Use Data Saver. On Samsung phones, go to Settings, then Connections, then Data usage, then Data saver, and turn it off there.
Will turning off Data Saver use more data?
Yes. It restores background sync, automatic updates, and higher streaming quality, all of which use more mobile data. How much more depends on your apps, so watch usage for a week after turning it off.
Can I turn off Data Saver for one app only?
On Android, yes: in Data Saver settings, use the unrestricted data list to exempt specific apps while keeping the restriction for everything else. On iPhone, there is no single exemption list, but per-app quality and Background App Refresh settings achieve a similar result for most apps.
Does Data Saver affect Wi-Fi?
No. Android Data Saver and iPhone Low Data Mode for cellular only restrict mobile data. On Wi-Fi, apps use data normally, unless a separate Wi-Fi Low Data Mode is switched on for that network on iPhone.
Why is data saving still on after I turned it off?
Check for a second switch: Wi-Fi Low Data Mode on iPhone, Ultra data saving mode on some Samsung phones, a Quick Settings Data Saver button, or an app-level data saver inside the app that is still behaving in a restricted way.
Related reading: earbud reset steps
The short version
iPhone: Settings, then Cellular, then Cellular Data Options, Low Data Mode off, and check Wi-Fi Low Data Mode too. Android: Settings, then Network and internet, then Data Saver off, or on Samsung, Settings, then Connections, then Data usage, then Data saver off. Then check app-level savers, because those survive the system switch. Keep a usage alert on, test for a week, and turn it back on whenever the bill matters more than the quality.
If you want to see what your habits cost before you change anything, the data usage calculator on CripsyWire turns daily use into a monthly total and a plan size.
More practical guides live on the CripsyWire blog.
The site itself is at CripsyWire.
For background on who runs it, see the about page.
Check the cost before you switch
See your monthly data total for your current habits, so turning data saving off does not turn into a surprise bill.

Continue Reading on CripsyWire
For more practical AI coverage for US buyers, see our full AI tools and agents library. When you are deciding between competing tools, the reviews and comparisons section breaks down head-to-head matchups. AI features that live inside your phone are tracked in smartphones, and AI on your wrist or finger in wearables. All of this is part of CripsyWire's broader Tech coverage — start at the homepage for what is newest.