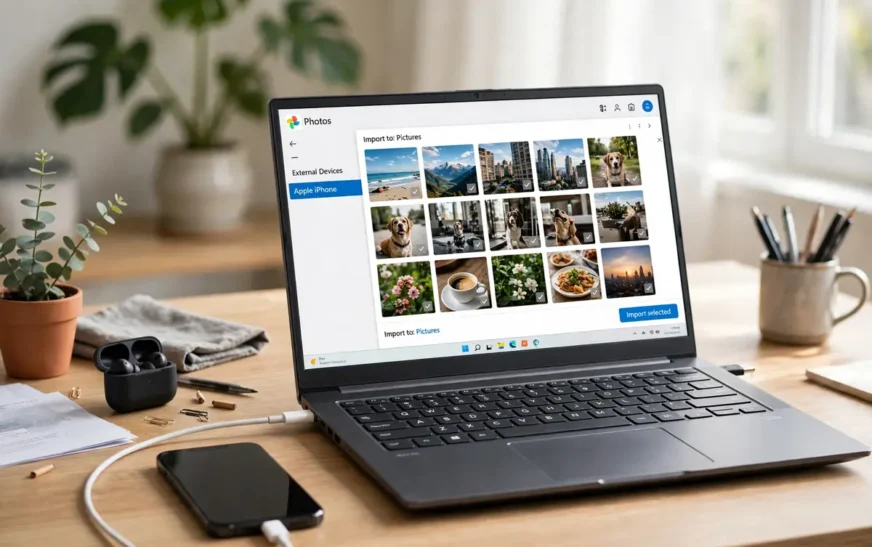
Quick answer: The most reliable way to send photos from iPhone to PC is a USB cable plus the free Apple Devices app from the Microsoft Store and the Windows Photos app: install Apple Devices once, connect the iPhone, unlock it, tap Trust, then open Photos on the PC and choose Import. That route keeps full resolution. iCloud Photos and Google Photos (set to Original quality) also keep full resolution without a cable. AirDrop works only to a Mac, not a Windows PC. Email and WhatsApp in Standard quality shrink your photos, so avoid them for anything you will edit or print. If your iPhone uses Optimize iPhone Storage, the full-resolution originals may live in iCloud rather than on the phone, which changes what a USB import can grab.
Most people look this up for one of three reasons: the phone is full, the photos need a real backup, or the pictures are headed for editing and printing where a compressed copy will show. The method you pick decides whether the files that land on the computer are the full-resolution originals or smaller copies that look fine on a phone screen and soft everywhere else.
There is no single best route. A cable is fastest for a thousand photos. iCloud is best when new photos should keep arriving by themselves. Google Photos is best when the household mixes iPhone and Android. The guide below covers all seven, with the exact steps, the quality each one keeps, and the fixes for the five problems that stop most transfers.
Before choosing, it helps to know how much you are moving. A 128GB phone holds roughly 20,000 to 40,000 standard photos when fairly empty, and a single minute of 4K video at 60fps takes about 440MB, so a holiday’s worth of video can outweigh years of photos. The guide on how many photos 128GB holds breaks the numbers down by photo type.
Which method should you pick?
| Method | Needs a cable? | Works on Windows? | Keeps full resolution? | Best for |
|---|---|---|---|---|
| USB + Windows Photos app | Yes | Yes | Yes | A large one-time import |
| File Explorer (DCIM drag and drop) | Yes | Yes | Yes | Picking specific folders by hand |
| iCloud Photos | No | Yes (iCloud for Windows) | Yes | New photos arriving automatically |
| Google Photos | No | Yes | Yes, on Original quality | Mixed iPhone and Android households |
| AirDrop | No | No (Mac only) | Yes | A few photos to a Mac |
| Email, Messages, WhatsApp | No | Yes | No (compressed) | One or two photos, fast |
| USB drive or transfer app | Varies | Yes | Usually yes | No internet and no computer nearby |
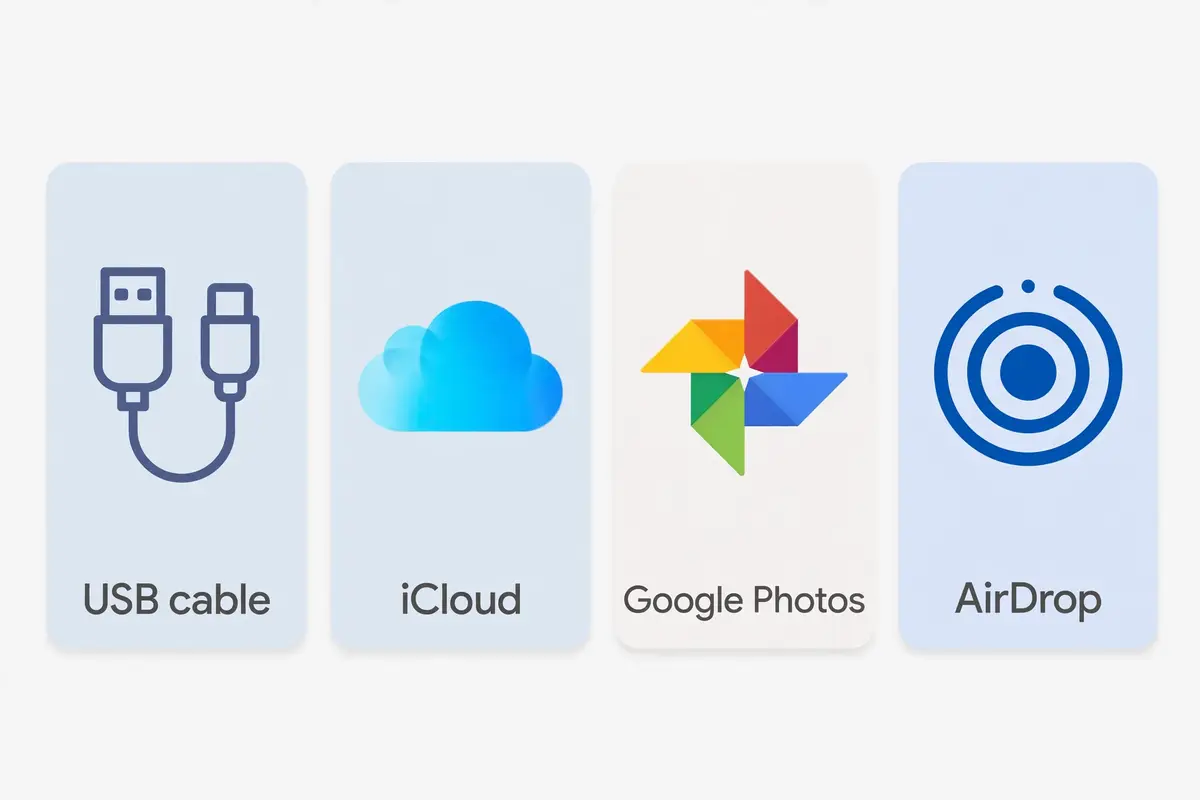
If you only remember one row, remember the first: USB plus the Windows Photos app is the route Apple documents for a Windows PC, it needs no subscription, and it keeps the originals.
Before you start: three checks that prevent most failures
First, keep the iPhone unlocked while the computer reads it. A locked iPhone cannot be read by any computer, cable or not. The first time you connect to a computer, the phone shows a “Trust This Computer?” alert. Tap Trust and enter your passcode. That trust is stored per computer, so you only do it once per machine.
Second, use a data-capable cable. Some cheap cables only carry power, and the phone will charge happily while the computer sees nothing. If the iPhone never appears on the PC, the cable is the first suspect, not the phone. The same applies to a worn port: lint in the Lightning or USB-C port breaks the data connection long before it breaks charging, and the guide on how to fix a phone that will not charge covers cleaning the port safely.
Third, check the transfer setting that decides HEIC versus JPEG. iPhones shoot in HEIC by default, a format Windows does not open out of the box. Go to Settings, then Apps, then Photos, then “Transfer to Mac or PC”. On Automatic, the iPhone converts HEIC to JPEG during a USB transfer, which is convenient and loses almost nothing visible. On Keep Originals, the iPhone sends the HEIC files untouched, and Windows needs the free HEIF Image Extensions from the Microsoft Store to open them. Pick Automatic unless you specifically want HEIC files.
Method 1: USB cable plus the Windows Photos app
This is the main route for a Windows PC, and it is the one Apple documents. Apple’s free Apple Devices app provides the connection Windows needs to see the iPhone, and Microsoft’s Photos app does the importing.
- On the PC, install Apple Devices from the Microsoft Store. You only do this once. It replaces the old iTunes drivers, and it brings the drivers Windows needs to recognise the iPhone.
- Connect the iPhone to the PC with a data-capable cable.
- Unlock the iPhone. When it asks whether to trust this computer, tap Trust or Allow and enter your passcode.
- On the PC, select the Start button, then open Photos.
- Select Import, then select your iPhone from the list of connected devices.
- Pick the photos and videos you want, choose the destination folder, and start the import.
The import copies files and leaves the iPhone’s library exactly as it was. Nothing is deleted from the phone unless you turn on a delete option, and the app flags that option before the step where it appears. If the import stalls on a large batch, split it into smaller groups of a few hundred photos at a time.
One catch matters more than any other: if iCloud Photos is on with Optimize iPhone Storage, the phone may hold small previews while the full-resolution originals sit in iCloud. A USB import then copies the previews, not the originals. The fix is to download the originals first, either by turning off Optimize iPhone Storage and waiting for the downloads, or by using the iCloud route in Method 3 instead.
Method 2: File Explorer and the DCIM folder
If you would rather pick files by hand than trust an import wizard, Windows File Explorer does the job. Connect the iPhone by cable, unlock it, tap Trust, then open File Explorer and look under This PC for Apple iPhone. Open it, then open Internal Storage and the DCIM folder.
Photos sit in numbered subfolders with names like 100APPLE and 101APPLE, so check each one rather than assuming everything lives in the first folder. Select the files, then copy and paste or drag them to a folder on the PC. Copy, do not move, until you have opened a few files on the PC and confirmed they are intact.
This route has two limits. It only shows camera media, not documents from other apps, and it does not show the whole iPhone filesystem. It also skips the sorting the Photos app does for you, so a library with years of photos becomes a manual job. For a full-library move, Method 1 is faster. For grabbing last weekend’s folder, Method 2 is quicker.
Method 3: iCloud Photos and iCloud for Windows
Cloud routes upload the photo from the phone and let you open or download it on any computer, Mac or Windows, without a cable. iCloud Photos is the one most iPhone owners already have half set up.
On the iPhone, go to Settings, tap your name, tap iCloud, tap Photos, and turn on iCloud Photos. Every photo uploads at full resolution. On the PC, install iCloud for Windows from the Microsoft Store, sign in with the same Apple Account, and turn on Photos. The library appears in File Explorer under iCloud Photos, and new photos keep arriving by themselves.
You can also open iCloud.com in any browser, sign in, open Photos, and download selected pictures without installing anything. That is the fastest option on a computer that is not yours.
Two warnings belong here. First, iCloud Photos is a sync, not a separate backup copy. Deleting a photo on any synced device deletes it everywhere, so a transfer to the PC that is meant as a backup should be followed by copying the files out of the iCloud Photos folder into a folder iCloud does not manage. Second, the free iCloud plan is 5GB, which a photo library outgrows fast. If the upload stalls, the usual cause is a full iCloud plan, not a broken connection. The guide on how to get more storage on your phone covers what fills a phone and what actually frees space when the plan is full.
Method 4: Google Photos
Google Photos is the best cross-platform option, and the one to pick when the household mixes iPhone and Android. Install Google Photos on the iPhone, sign in, turn on backup, and set the backup quality to Original quality. That last setting is the whole point: the default “Storage saver” setting compresses photos slightly, while Original quality keeps the file exactly as shot.
Once backup finishes, open photos.google.com on the PC, sign in with the same Google account, select the photos, and download them. You can also install Google Drive for desktop and let the library sync to a folder.
Google Photos is also the simplest answer to the question of how to send photos from iPhone to PC without a cable when iCloud storage is full, because the 15GB of free Google storage is separate from Apple’s 5GB. The trade-off is that you are now managing two photo libraries, and the free tier still fills up. For a household that already lives in Google services, that trade-off is usually worth it.
Method 5: AirDrop to a Mac
AirDrop sends photos wirelessly from an iPhone to a nearby Mac, and it keeps full resolution. Open the photo, tap Share, tap AirDrop, and pick the Mac. For a batch, select several photos in the Photos app, tap Share, and send them all at once.
The limit is absolute: AirDrop works only between Apple devices, so it is not an option for a Windows PC at all. If the destination is a PC, use one of the methods above. If the destination is a Mac, AirDrop is the fastest way to move a handful of photos, and the Mac Photos app import in Method 1 is the fastest way to move the whole library. Connect the iPhone to the Mac by cable, open Photos, click the iPhone in the sidebar, and click Import.
Method 6: Email, Messages, and WhatsApp
Sometimes the fastest route is the one already open on the screen. Select a photo, tap Share, and send it by email or message. For one or two photos that only need to be seen, this is fine.
For anything you will edit or print, it is not. Email caps attachments at around 25MB per message, and most mail apps shrink large photos before sending. Messages compresses photos when sending to a non-Apple phone. WhatsApp in Standard quality resizes images on the way, and only its HD setting keeps something close to the original. The photo that arrives looks identical on a phone screen, and visibly softer once it is cropped or printed.
Use this method for sharing, not for archiving. If the goal is a backup, use a cable or a cloud route instead. And if the phone is nearly full before you even start, the guide on how to clear storage on your phone walks through a safe cleanup that does not delete anything you have not already copied elsewhere.
Method 7: A USB drive or a transfer app
Two more routes cover the awkward cases. A USB-C flash drive with a Lightning or USB-C connector plugs straight into the iPhone: open Files, select the photos, and copy them to the drive, then plug the drive into the PC. No internet, no cable to a computer, no account needed. Check the drive’s format first, because some drives arrive formatted in a way the iPhone cannot write to.
Transfer apps work the other way: they upload the selected files and hand you a download link or code for the PC. They are useful when the two devices are not in the same room and there is no cable, but they only move files you can already select or export, and for a large library the upload time makes them slower than a cable.
HEIC versus JPEG: what actually arrives on your PC
The format question confuses more people than any step in the transfer. Here is the short version. iPhones shoot HEIC by default because the files are roughly half the size of JPEG at the same quality. Windows Photos could not open HEIC at all until the HEIF Image Extensions arrived in the Microsoft Store, and many Windows apps still cannot.
The transfer setting decides what crosses the cable. On Automatic, the iPhone converts HEIC to JPEG during the transfer, and the files open everywhere on the PC. On Keep Originals, the iPhone sends HEIC untouched, and you need the HEIF extensions installed before the files will open. iCloud and Google Photos keep the original format in the cloud and convert on download depending on the app you use.
For most people, Automatic is the right setting. The conversion is high quality, and the compatibility is worth more than the smaller file size. Keep Originals is for people who edit in apps that read HEIC natively and want the smallest files. Either way, check one transferred photo on the PC before deleting anything from the phone.
Troubleshooting: five problems that stop most transfers
The iPhone does not appear on the PC. First, try a different cable and a different USB port, because a charge-only cable is the most common cause. Then check that the phone is unlocked and that you tapped Trust. If Apple Devices is not installed, install it from the Microsoft Store and restart the PC. A restart fixes more of these cases than any setting change.
The Trust prompt never appears. Unplug the cable, lock and unlock the phone, then plug it back in. If it still does not appear, the cable or port is the likely fault. Lint in the port is a real cause: a toothpick used gently, or a blast of compressed air, clears it. The phone charging normally does not prove the data pins work.
HEIC files will not open on Windows. Install the HEIF Image Extensions from the Microsoft Store, which is free. If you would rather not deal with it, set the iPhone’s transfer setting to Automatic and re-transfer, and the phone will send JPEG instead.
Some photos are missing from the import. The usual cause is Optimize iPhone Storage: the missing photos are full-resolution originals in iCloud, with only small previews on the phone. Download the originals first, or use the iCloud route. The other cause is a filter in the Photos app import screen showing only new items; switch it to show all items.
The transfer is slow or stops halfway. Large video files are the usual cause, especially 4K at 60fps. Transfer video separately from photos, in smaller batches, and keep the phone awake and unlocked during the copy. If the phone gets hot during a long transfer, let it cool before continuing. The guide on why a phone overheats explains what pushes a phone into thermal throttling and what to do about it.
How much space will the transfer free?
A transfer only frees space on the phone if you delete the copies afterwards, and only after you have checked the copies on the PC. The safe order is: transfer, open a sample of photos and one video on the PC, confirm they are full resolution, copy them to a second place if they matter, and only then delete from the phone.
How much you get back depends on what you shoot. Standard photos run about 2 to 4MB each, so a thousand photos is roughly 2 to 4GB. Live Photos carry a short video with each still, so they cost more. 4K video is the heavyweight: a minute at 60fps is about 440MB, so ten minutes of it is over 4GB. That is why a phone can feel full after one holiday even when the photo count looks modest.
Before deleting, check what is actually using the space. Go to Settings, then General, then iPhone Storage, and look at the Photos figure. The guide on what takes up the most storage on your phone explains the full audit.
If the number still does not add up after deleting, the guide on why your phone storage is full after deleting everything covers the hidden caches and recently deleted album that keep the space occupied.
For planning the next transfer, the phone storage calculator estimates how much room your photo and video habits need.
The guide on how much phone storage you need matches the size to the user type.
One more caution: if iCloud Photos is on, deleting a photo from the iPhone deletes it from iCloud too, and from every device on the same account. Turn off iCloud Photos sync before deleting, or delete only after the PC copy is verified and stored somewhere iCloud does not manage. A transfer that ends in a deletion without a verified copy is not a backup, it is a loss waiting for a failed drive.
Frequently asked questions
How to send photos from iPhone to PC without a cable?
Use iCloud Photos or Google Photos. Turn on iCloud Photos on the iPhone and install iCloud for Windows on the PC, or turn on Google Photos backup set to Original quality and download from photos.google.com. Both keep full resolution without a cable. AirDrop is not an option here, because it only works to a Mac.
Why won’t my iPhone photos transfer to PC?
The most common causes are a charge-only cable, a locked phone, a missed Trust prompt, and the Apple Devices app not being installed. Try a different data-capable cable and USB port, unlock the phone, tap Trust when prompted, install Apple Devices from the Microsoft Store, and restart the PC. If only some photos are missing, the likely cause is Optimize iPhone Storage keeping the full-resolution originals in iCloud.
Do photos lose quality when sent from iPhone to PC?
Not when you use a cable, iCloud Photos, Google Photos on Original quality, or AirDrop. They do lose quality over email, Messages to a non-Apple phone, and WhatsApp in Standard quality, which resize or compress the image. The HEIC to JPEG conversion on Automatic transfer is high quality and does not visibly degrade the photo.
Can I send photos from iPhone to PC without iTunes?
Yes. iTunes is no longer needed. On Windows, the free Apple Devices app from the Microsoft Store provides the connection, and the Windows Photos app does the importing. You can also use File Explorer, iCloud Photos, Google Photos, or a USB drive, none of which involve iTunes.
How do I transfer photos from iPhone to PC with a USB cable?
Install the Apple Devices app from the Microsoft Store, connect the iPhone with a data-capable cable, unlock it and tap Trust, open the Windows Photos app, choose Import, select your iPhone, pick the photos, and choose the destination folder. For manual control, open the iPhone in File Explorer under This PC, open Internal Storage and DCIM, and copy the folders by hand.
What is the fastest way to send a lot of photos from iPhone to PC?
A USB cable with the Windows Photos app, in batches of a few hundred photos at a time. It is faster than any upload because nothing crosses the internet. iCloud Photos is faster only for photos that are already uploaded, and Google Photos is faster only when the backup is already complete.
Bottom line
For a Windows PC, the cable route wins: Apple Devices plus the Windows Photos app, full resolution, no subscription, no upload wait. For a Mac, the same cable route through the Photos app, or AirDrop for a handful. For no cable at all, iCloud Photos or Google Photos on Original quality, with the Optimize iPhone Storage gotcha in mind before you trust a USB import. Email and WhatsApp are for sharing, not for archiving.
Whatever route you pick, verify the copy on the computer before deleting anything from the phone, and remember that a synced library is not a backup. Transfer, check, copy somewhere safe, then delete. That order is the whole trick.
If you are moving to a new phone rather than a computer, the guide on how to transfer contacts to a new phone covers every method that works.
How much storage do your photos really need?
Check before your next transfer — see what 64GB, 128GB, 256GB or 1TB actually holds for your photo and video habits, free, with no sign-up.

Continue Reading on CripsyWire
For more practical tutorials and hidden features, see our full how-to guides section. AI workflow guides feed into the broader AI tools and agents coverage, phone tricks live in smartphones, and wearable setup walkthroughs in wearables. When you are deciding what to buy, the reviews and comparisons section helps. All part of CripsyWire Tech, and the homepage shows what is newest.