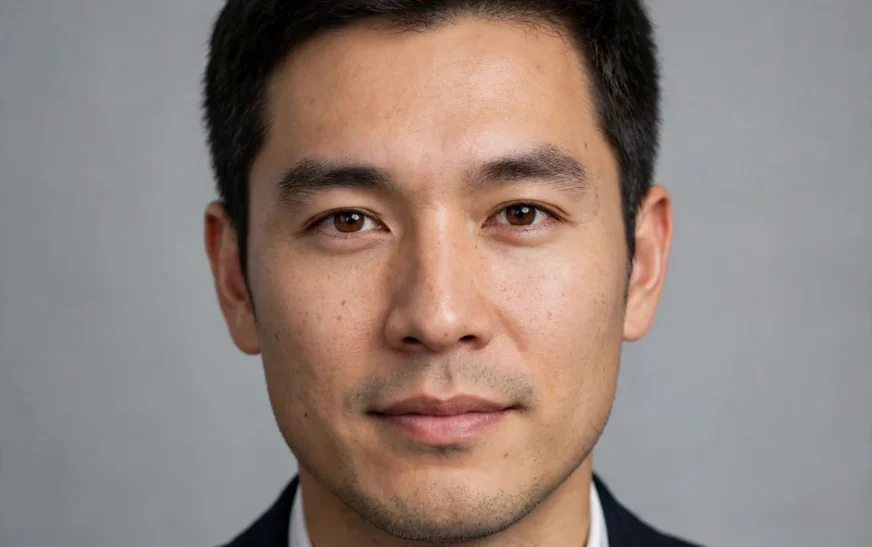
Quick answer: A strong AI prompt for a professional headshot names the person type, the clothing, a plain background, soft studio lighting, and a head-and-shoulders framing — for example: “Professional headshot of a woman in her thirties wearing a navy blazer, plain light grey background, soft studio lighting, looking at the camera, head and shoulders, photorealistic.” Skip busy backgrounds, dramatic angles, and fashion poses, and the result reads as a work portrait instead of a holiday photo.
What a professional headshot actually is
A professional headshot is not just a nice photo of a face. It is a photo with a job to do: make a stranger trust you in about two seconds, on a profile page, a company directory, a pitch deck, or a conference badge. That job shapes every choice in the prompt. The background should not compete with the face. The clothing should not distract from the face. The lighting should flatter without looking dramatic. The pose should look confident without looking posed.
Most AI headshots fail because the prompt asks for a portrait, not a headshot. A portrait can be artistic, moody, and interesting. A headshot must be clear, plain, and repeatable. If you prompt for “a beautiful portrait”, you will get art. If you prompt for “a professional headshot, head and shoulders, plain background, soft studio light”, you will get something you can actually put on LinkedIn.
Think about where the photo will live before you write the prompt. A corporate directory wants a neutral background and formal clothing. A creative portfolio can handle a warmer background and a more relaxed shirt. A speaker bio wants a confident, approachable look. The prompt should match the destination, not just the person, because “professional” means something slightly different in each of those places.
The anatomy of a headshot prompt
A reliable headshot prompt has six parts, and the order matters less than the completeness:
- Person description. Age range, and only the details that matter for the role: “a man in his forties”, “a woman in her late twenties”. Avoid over-specifying features you do not need, because every extra feature is another thing the model can render oddly.
- Clothing. This is the fastest signal of professionalism. A blazer, a smart shirt, a plain blouse — one item, named plainly. “Wearing a charcoal blazer over a white shirt” tells the model more than “smartly dressed” ever will.
- Background. Plain, named, and boring on purpose: light grey, soft beige, pale blue, or a softly blurred office. A plain background is not a lack of creativity, it is the point. It keeps the eye on the face.
- Lighting. Soft studio lighting is the safe default. It evens out skin, softens shadows, and looks like a real studio shot. Avoid “dramatic” lighting for a headshot, because drama in a headshot reads as moodiness, not confidence.
- Pose and expression. Head and shoulders, facing the camera, slight smile or neutral confident expression. “Looking at the camera” is a small phrase that does a lot of work, because a headshot where the subject looks away feels like a candid, not a portrait for work.
- Framing and style. “Head and shoulders, photorealistic” sets the crop and the medium in one breath. Without the framing, you may get a full-body shot that crops badly on a profile page.
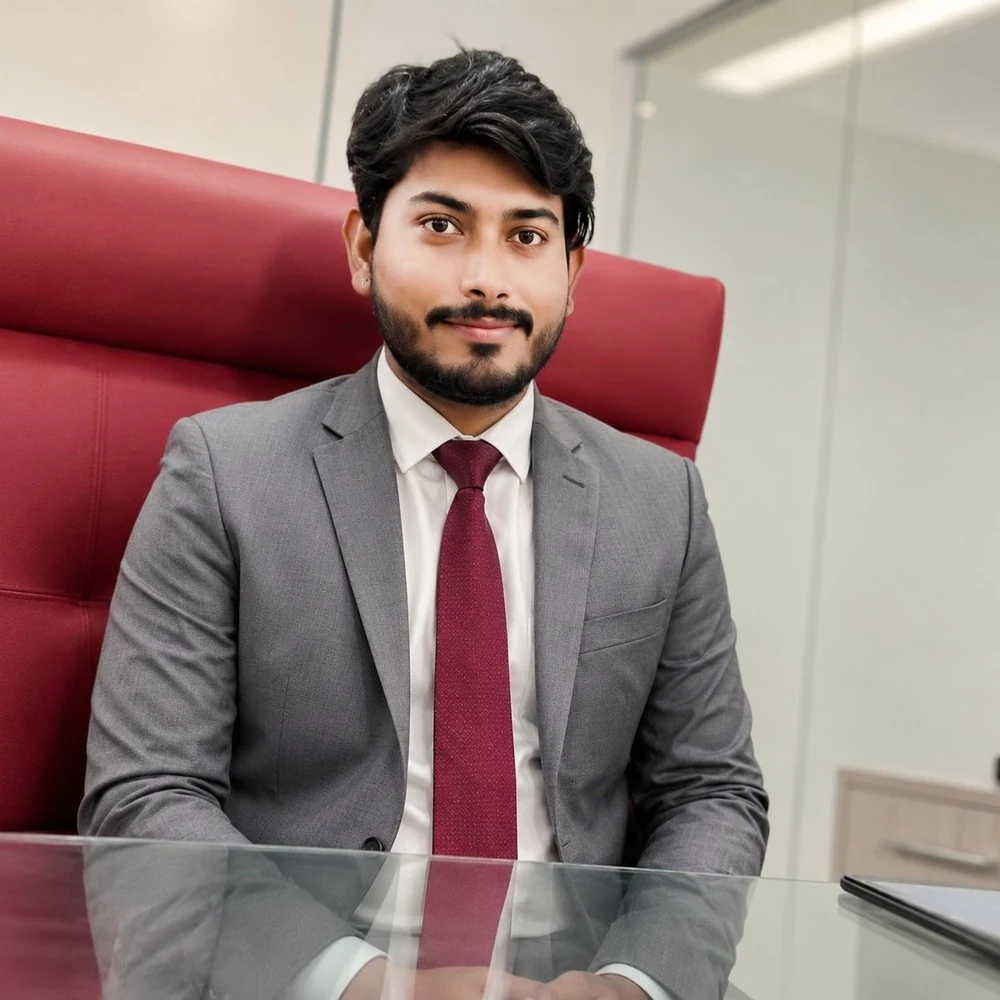
Put those six together and you get a prompt that is hard to get wrong: “Professional headshot of a man in his forties wearing a dark suit jacket, plain light grey studio background, soft studio lighting, looking at the camera with a slight smile, head and shoulders, photorealistic.”
Clothing: the detail that decides the job
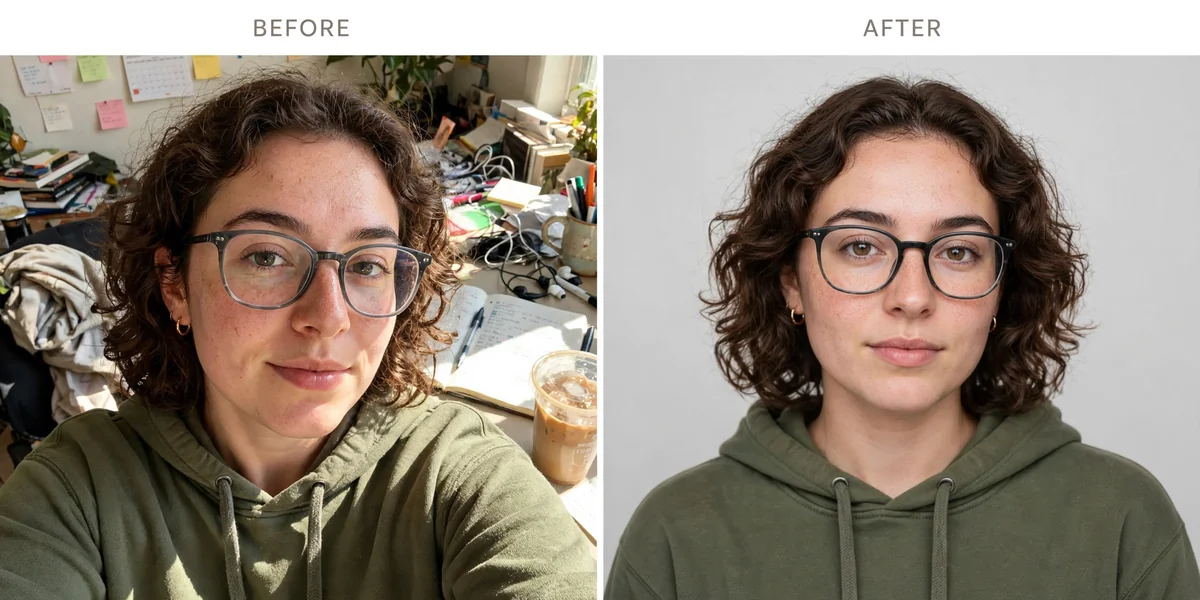
Clothing is where most AI headshots give themselves away. The model may invent a strange collar, a melting tie, or a jacket that does not sit right on the shoulders. The fix is to keep clothing simple and structured. A blazer, a shirt, or a blouse with a clean neckline renders far more reliably than layered outfits, scarves, or patterned clothing. Patterns are a particular risk: stripes and checks can shimmer or warp in generated images, so solid colors are the safer choice for a headshot.
Color matters too. Navy, charcoal, black, and dark grey read as formal and photograph well against a light background. White can work, but only against a darker background, or the subject melts into the backdrop. If the background is light grey, pick a darker top. If the background is dark, pick a lighter top. Contrast between subject and background is what makes a headshot readable at thumbnail size, which is how most people will first see it.
For different industries, adjust one item, not the whole prompt. A tech founder might wear a smart casual shirt instead of a blazer. A lawyer might wear a suit and tie. A doctor might wear a smart shirt rather than a uniform, unless the uniform is the point. Change the clothing phrase, keep the background, lighting, and framing the same, and the headshot stays professional while matching the industry.
One more practical tip: avoid asking for jewellery, glasses with reflections, or hats in a headshot prompt unless they are essential. Each is a small object the model must render correctly, and small objects are where generated images most often slip. If glasses are part of the person’s look, ask for “plain glasses, no glare” and check the result closely.
Background and lighting, the quiet pair
Background and lighting do the quiet work in a headshot. A plain background in a soft color — light grey, warm beige, pale blue — keeps attention on the face and matches almost any website design. A blurred office background can work for a creative role, but it must stay blurred; if the background sharpens, it competes with the face and the photo stops looking like a headshot.
Lighting is the difference between “studio” and “snapshot”. Soft studio lighting means even light on the face, soft shadows, and no harsh highlights. Phrases like “soft diffused studio light” or “even studio lighting” get you there. Harsh directional light, strong side light, or neon light may look artistic, but they carve shadows into the face and make a headshot look like a film still.
Watch the background-lighting combination. A light background with soft light gives a bright, approachable headshot. A dark background with soft light gives a more formal, editorial headshot. Both are professional. What is not professional is a background and lighting that fight each other, like a bright outdoor background with moody indoor lighting, which reads as a composite even when it is not.
If you are generating headshots for a team, use the same background and lighting phrases for every person. Consistency is what makes a team page look like a team page. Vary the person and the clothing, keep the background and lighting fixed, and the set will look like it came from one studio session.
Pose, expression, and framing
The safest pose for a professional headshot is also the simplest: head and shoulders, chest up at most, facing the camera, shoulders square or at a very slight angle. Anything more dramatic — a full turn, a hand on the chin, a lean — moves the photo from headshot into portrait territory, and it usually looks less professional on a profile page.
Expression deserves a deliberate choice. A slight smile reads as approachable and confident, which suits most professional uses. A neutral expression reads as serious and formal, which suits law, finance, and executive pages. A big grin reads as friendly but can look casual on a formal page. Pick the expression that matches the destination, and name it in the prompt: “slight smile” or “neutral confident expression” are both clearer than “friendly”.
Framing is the last guardrail. “Head and shoulders” is the standard crop for a headshot, and it matters because profile photos are usually displayed as squares or circles. A head-and-shoulders shot crops cleanly into a circle. A wider shot crops badly, cutting off the top of the head or leaving too much empty space. If the tool lets you set an aspect ratio, a square ratio suits most profile uses.
Eyes matter more than any other feature. “Looking at the camera” and “sharp focus on the eyes” are worth including, because a headshot where the eyes are soft or looking away loses its purpose. When you review a generated headshot, check the eyes first, then the hands if any are visible, then the clothing edges. Those three checks catch most problems in seconds.
Copy-ready prompts by use case
Corporate directory: “Professional headshot of a woman in her thirties wearing a navy blazer, plain light grey studio background, soft studio lighting, looking at the camera with a slight smile, head and shoulders, photorealistic.”
Creative portfolio: “Professional headshot of a man in his late twenties wearing a smart casual dark shirt, warm beige studio background, soft natural window light, looking at the camera, relaxed confident expression, head and shoulders, photorealistic.”
Speaker bio: “Professional headshot of a woman in her forties wearing a charcoal jacket, plain soft blue background, even studio lighting, looking at the camera with a confident slight smile, head and shoulders, photorealistic.”
Startup founder: “Professional headshot of a man in his thirties wearing a plain dark shirt, light grey background, soft studio lighting, looking at the camera, approachable expression, head and shoulders, photorealistic.”
Author page: “Professional headshot of a woman in her fifties wearing a smart blouse, warm neutral background, soft window light, looking at the camera with a gentle smile, head and shoulders, photorealistic.”
Each of these changes only the person, clothing, and background color. The structure stays the same, which is why they are reliable. Swap one element at a time for your own case, and keep the rest fixed.
For building these prompts quickly, the CripsyWire AI image prompt builder lets you pick style, lighting, and composition and copy a ready prompt. It is a handy starting point when you know the look you want but not the words for it.
The mistakes that ruin a headshot
Busy background. A street, a bookshelf in focus, or a patterned wall pulls the eye away from the face. Fix it by naming a plain background and, if the tool allows, asking for a blurred background.
Fashion pose. A hand on the hip, a dramatic turn, or a low angle makes the photo look like a magazine shoot, not a work portrait. Fix it with “head and shoulders, facing the camera”.
Over-styled clothing. Patterns, layers, and accessories render unreliably and distract. Fix it with one solid-colored item of clothing.
Harsh light. Strong shadows across the face age the subject and look unprofessional. Fix it with “soft studio lighting” and avoid “dramatic” or “harsh” light words.
Wrong crop. A full-body or wide shot that crops badly on a profile page. Fix it with “head and shoulders” and a square ratio where possible.
Too many faces. Asking for a group, or a reflection that becomes a second face, confuses the model. A headshot is one person. Keep it that way.
Unrealistic skin. Over-smoothing words like “flawless” or “perfect skin” often produce a plastic look. Use “natural skin texture” instead, and let the model render a real face.
Review each generated headshot at the size it will actually be used, not just full-screen. A headshot that looks fine large can look muddy as a small circle avatar, and a headshot that looks plain large can look crisp and professional small. Judge it where it will live.
Honesty about AI headshots
An AI headshot is an illustration of a person, not a photograph of them, and that distinction matters. For a fictional persona, a placeholder, a character bio, or a design mockup, an AI headshot is a practical tool. For a real person’s professional identity — a job application, a company directory, a verified profile — a real photograph is the honest choice, and most readers expect it to be one. Using an AI image as if it were a real photo of a real person can mislead employers, clients, and colleagues, and it can backfire badly if discovered.
If you do use an AI headshot for a real person, be open about it where it matters, and never use it to impersonate someone else or to create a false identity. The prompt skill in this guide is the same skill whether the headshot is for a character or a concept, and the ethical line is about how the image is presented, not how it was made.
There is also a practical reason to prefer real photos for real people: likeness. An AI model cannot reliably reproduce a specific real person’s face from a text description, and a headshot that looks “almost” like you is worse than one that clearly does not, because it creates confusion. Use AI headshots for personas and placeholders, and book a short studio session for your own professional photo. The same care with lighting and framing that this guide teaches will help you brief a real photographer too.
This is the same kind of honest framing that runs through other CripsyWire guides. The best free AI video generators guide, for example, is careful about what AI tools can and cannot do well, rather than promising that they replace every human skill.
Iterating a headshot prompt
Headshots reward small, patient iteration. Generate a first version, then change one element: the background color, the clothing, or the expression. Do not rewrite the whole prompt, or you will lose the parts that worked. If the face is right but the background is wrong, change only the background phrase. If the clothing is right but the light is harsh, change only the lighting phrase.
Generate a few variations of the same prompt when you can. Small differences in the model run can change the face noticeably, and picking the best of four is faster than rewriting the prompt four times. When you find a version you like, save the exact prompt. That prompt becomes your house style for the next headshot, and consistency across a team page is worth more than any single perfect image.
Pay attention to what the model does with age and gender descriptors. Vague descriptors can produce stereotyped results, so be specific about the role and clothing rather than leaning on appearance clichés. “A marketing director in a navy blazer” is a better prompt than a list of appearance traits, because it describes the job the photo must do.
If a headshot keeps failing in the same way — the same warped collar, the same odd ear, the same background creeping back — simplify the prompt. Remove one detail at a time until the failure disappears, then add details back one at a time. That process finds the offending phrase faster than guessing.
Headshots for teams and brands
For a team page, the goal is not one great headshot, it is a set that looks like it belongs together. Use one prompt template for the whole team, changing only the person description and clothing. Keep background, lighting, framing, and style identical. The result reads as a single studio session, even though each image was generated separately.
For a brand, the headshot style should match the brand’s visual language. A formal brand wants neutral backgrounds and dark clothing. A friendly consumer brand can use warmer backgrounds and softer light. A creative brand can use a blurred, warm background. Decide the brand look once, write it into the template, and reuse it.
For social profiles, remember that most platforms crop to a circle. A head-and-shoulders shot with the face centered crops well. A shot with the face off-center, or with important details near the edges, crops badly. Check the circle crop before you publish, not after.
And for any headshot that will be printed — a conference badge, a book jacket, a poster — generate at the highest resolution the tool allows, and check the image at print size. A headshot that looks sharp on a phone screen can look soft in print, and there is no prompt fix for low resolution after the fact.
Headshots in a wider AI workflow
A headshot rarely lives alone. It usually sits inside a wider set of AI-assisted work: a profile, a portfolio, a pitch, a team page. Thinking about that wider workflow helps you write a better headshot prompt, because the headshot must match the rest of the material around it.
For a start, a headshot for a founder or creator often appears next to writing about AI tools and side projects. The guide to AI side projects that earn is a useful reminder that a professional image is part of a professional presence, not a decoration on top of it. The photo should match the seriousness of the work it introduces.
A headshot for someone building AI products also sits naturally next to explanations of how those products work. The guide to building your own AI agent covers the same idea from the other side: a clear, well-structured explanation builds trust, and a clear, well-structured photo does the same.
For a team page, consistency matters more than any single photo, as noted above. The same consistency principle applies to the tools a team uses every day. The roundup of the best AI productivity tools shows how a shared toolkit makes a team look coherent, and a shared headshot template does the same for its faces.
A headshot also travels: from a profile page to a phone, to a watch notification, to a conference badge. That is why the small-size test matters so much. The comparison of fitness trackers and smartwatches is a reminder that people increasingly meet you first on a tiny screen, and a headshot that works at avatar size is a headshot that works.
For a speaker or author, the headshot often appears next to a device the audience recognises — a phone, a laptop, a watch. The review of the latest Samsung smartwatch shows how a single product photo can carry a whole article, and a headshot works the same way: one clear image, doing one job well.
Practical preparation matters too. Before a headshot session, real or AI-generated, it helps to have your files in order. The guide to backing up a phone is a good prompt to sort your photos before you pick a reference or a style.
That same tidy-up habit applies to the people you will share the headshot with, as covered in the guide to moving contacts to a new phone.
Finally, a clean device helps a clean result. If you are reviewing generated headshots on a phone, a cluttered, slow device makes the job harder. The guide to clearing cache on Android is a small, practical step that makes reviewing images less frustrating.
Small efficiencies add up across a whole workflow, as shown in the guide to saving money with AI agents.
None of these links change the headshot prompt itself. They change the context around it, and a headshot judged in its real context — a profile, a team page, a tiny avatar — is a headshot judged fairly.
FAQ
What should an AI prompt for a professional headshot include?
Person type, clothing, plain background, soft studio lighting, pose and expression, and head-and-shoulders framing. Those six parts cover everything the model needs to produce a usable work portrait.
How do I keep an AI headshot from looking fake?
Use natural skin texture language, simple solid clothing, soft even lighting, and a plain background. Avoid “flawless”, “perfect”, and over-styled outfits, which tend to produce a plastic or fashion-shoot look.
What background is best for a professional headshot?
A plain light grey, warm beige, or pale blue background suits most uses. Dark backgrounds suit formal or editorial uses. Busy or in-focus backgrounds distract from the face and should be avoided.
Can I use an AI headshot on LinkedIn?
Technically you can generate one, but for a real person’s identity a real photograph is the honest and expected choice. AI headshots are better suited to personas, placeholders, characters, and design mockups.
Why do AI headshots often get clothing wrong?
Complex clothing, patterns, layers, and small accessories are hard for image models to render. Simple, solid-colored clothing with a clean neckline renders far more reliably.
How do I make a whole team look consistent?
Use one prompt template for everyone, changing only the person and clothing. Keep background, lighting, framing, and style identical across the set.
The short version
A professional headshot prompt is a work brief, not an art brief. Name the person, name one item of clothing, name a plain background, ask for soft studio light, face the camera, and crop head and shoulders. Keep it simple, keep it consistent, and judge the result at the size it will actually be used. Do that, and the headshot will do its job: make a stranger trust the person in it, in about two seconds.
More practical guides live on the CripsyWire blog.
The site itself is at CripsyWire.
For background on who runs it, see the about page.
Build your headshot prompt in seconds
Pick your style, lighting, and composition, and copy a ready-to-paste prompt for your next professional headshot.
Continue Reading on CripsyWire
For more practical AI coverage for US buyers, see our full AI tools and agents library. When you are deciding between competing tools, the reviews and comparisons section breaks down head-to-head matchups. AI features that live inside your phone are tracked in smartphones, and AI on your wrist or finger in wearables. All of this is part of CripsyWire's broader Tech coverage — start at the homepage for what is newest.