Most people only go looking for their motherboard model when something forces them to. You’re about to buy a new RAM kit and don’t want to waste $90 on sticks that won’t fit. A game keeps crashing and a forum thread says “update your BIOS first.” You’re selling the PC and a buyer wants the spec sheet. Whatever dragged you here, the good news is the same: you almost never need a screwdriver.
I’ve built and torn down enough machines to tell you that cracking the case open is usually the slowest way to answer this question. The model name is sitting in your firmware right now, and Windows, macOS, and Linux all have built-in ways to read it in under a minute. Below I’ll walk through every reliable method, when each one is worth using, and the small traps that trip people up — including a big change in recent Windows 11 builds that breaks the old advice you’ll still find on most blogs.
| Quick answer On Windows, press Windows + R, type msinfo32, press Enter, and read the “BaseBoard Manufacturer” and “BaseBoard Product” lines — that’s your motherboard’s make and model. Prefer the command line? Run Get-CimInstance Win32_BaseBoard in PowerShell. On Mac, look up your serial number for the logic board; on Linux, run sudo dmidecode -t baseboard. |
Why knowing your motherboard model actually matters
The motherboard is the part everything else plugs into — CPU, RAM, GPU, storage, the lot. People call it the mainboard, the baseboard, the system board, or on a Mac, the logic board. Different names, same job: it’s the spine that lets every component talk to the others.
Here’s where the exact model earns its keep:
- Upgrades that won’t waste money. Your board decides which CPU socket, how many RAM slots, what memory speed, and which PCIe version it supports. Manufacturers publish a Qualified Vendor List (QVL) of memory and CPUs they’ve actually tested — and you can’t find that list without the model name.
- BIOS and driver downloads. Chipset, LAN, and audio drivers are tied to a specific board. Grab the wrong BIOS file and you can brick the machine. The model is what points you to the right support page.
- Troubleshooting. When a PC won’t boot, support staff ask for the board model so they can match beep codes, debug LEDs, or known firmware bugs to your exact hardware.
It’s the same logic as any hardware project — you check what you’ve got before you buy. If you’re planning to expand your desk rather than your internals, the compatibility mindset carries straight over to picking ports and cables for a dual monitor setup. Know the hardware first, shop second.
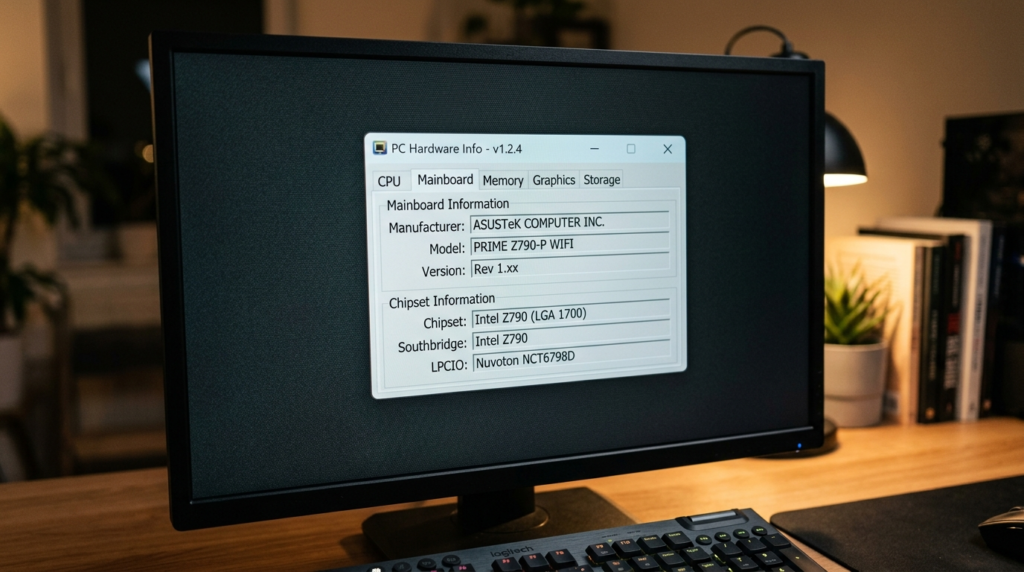
Method 1: Windows System Information (msinfo32)
This is the one I reach for first on any Windows 10 or Windows 11 machine. No download, no commands to memorize, and it’s been baked into Windows since the late ’90s.
- Press Windows + R to open the Run box.
- Type msinfo32 and hit Enter.
- With System Summary selected on the left, look down the right pane for three lines: BaseBoard Manufacturer, BaseBoard Product, and BaseBoard Version.
BaseBoard Manufacturer is the brand (Gigabyte, MSI, ASUS, ASRock). BaseBoard Product is the model you actually care about — something like B760M DS3H or ROG STRIX B650-A. BaseBoard Version is the hardware revision, which only matters in rare cases I’ll cover later.
| Snippet answer To check your motherboard with System Information: press Windows + R, type msinfo32, press Enter, and read BaseBoard Manufacturer and BaseBoard Product on the System Summary screen. This shows your board’s make and model without any extra software. |
Honest caveat: on some prebuilt and older systems these fields read “To be filled by O.E.M.” That’s not a fault — it means the assembler never wrote the name into the firmware. If that happens, jump to the BIOS or third-party tool methods below.
Method 2: Command Prompt and the WMIC change nobody warns you about
For years, the go-to trick was a single Command Prompt line:
wmic baseboard get product,Manufacturer,version,serialnumber
Type it exactly like that — commas, no spaces after them — and it spits out the model, brand, revision, and serial number in one shot. It still works on plenty of machines, and it’s genuinely fast.
But here’s the part most articles haven’t updated: Microsoft has been retiring WMIC. On newer Windows 11 builds (24H2 and the 25H2 update), the WMIC command is disabled by default, and a fresh install may not include it at all. So if you paste that line and get “‘wmic’ is not recognized as an internal or external command,” your PC isn’t broken — the tool is simply gone. That’s your cue to use PowerShell instead, which is the next method.
If you’re the type who’s comfortable living in a terminal — the same crowd who’d happily fix a slow DNS lookup from the command line — the PowerShell route below is the one worth committing to memory, because it isn’t going anywhere.
Method 3: PowerShell (the future-proof command)
PowerShell uses CIM cmdlets, the modern replacement for WMIC. This command works on Windows 10 and every Windows 11 build, and it won’t get pulled out from under you:
Get-CimInstance -ClassName Win32_BaseBoard | Format-Table Manufacturer, Product, SerialNumber, Version -AutoSize
Steps:
- Press Windows + R, type powershell, and press Enter. (Admin rights aren’t required.)
- Paste the command above and hit Enter.
- Read the Product column — that’s your model. Manufacturer is the brand, SerialNumber is unique to your board, and Version is the revision.
Want just the model and nothing else? This shorter version does the trick:
(Get-CimInstance Win32_BaseBoard).Product
One quiet advantage of PowerShell: it returns structured data, so IT folks can run it across dozens of machines and export the results to a CSV. Overkill for one home PC, but worth knowing if you ever manage more than your own.
Method 4: Check the BIOS / UEFI
This method shines in two situations: the software tools came back blank, or the PC won’t boot into Windows at all and you still need the model to fix it.
- Restart the PC. As it powers on, tap the BIOS key repeatedly — usually Delete, sometimes F2, occasionally F12 or F10 depending on the brand.
- Most modern boards open to an EZ Mode dashboard that prints the model right at the top. If you land in Advanced Mode, check the Main or System Information tab.

The board name is often shown next to the BIOS version, since the firmware is built specifically for that model. The exact wording varies by maker, but it’s always there on the main screen. The only annoyance is timing — some machines boot so fast you have to mash the key the instant the logo appears.
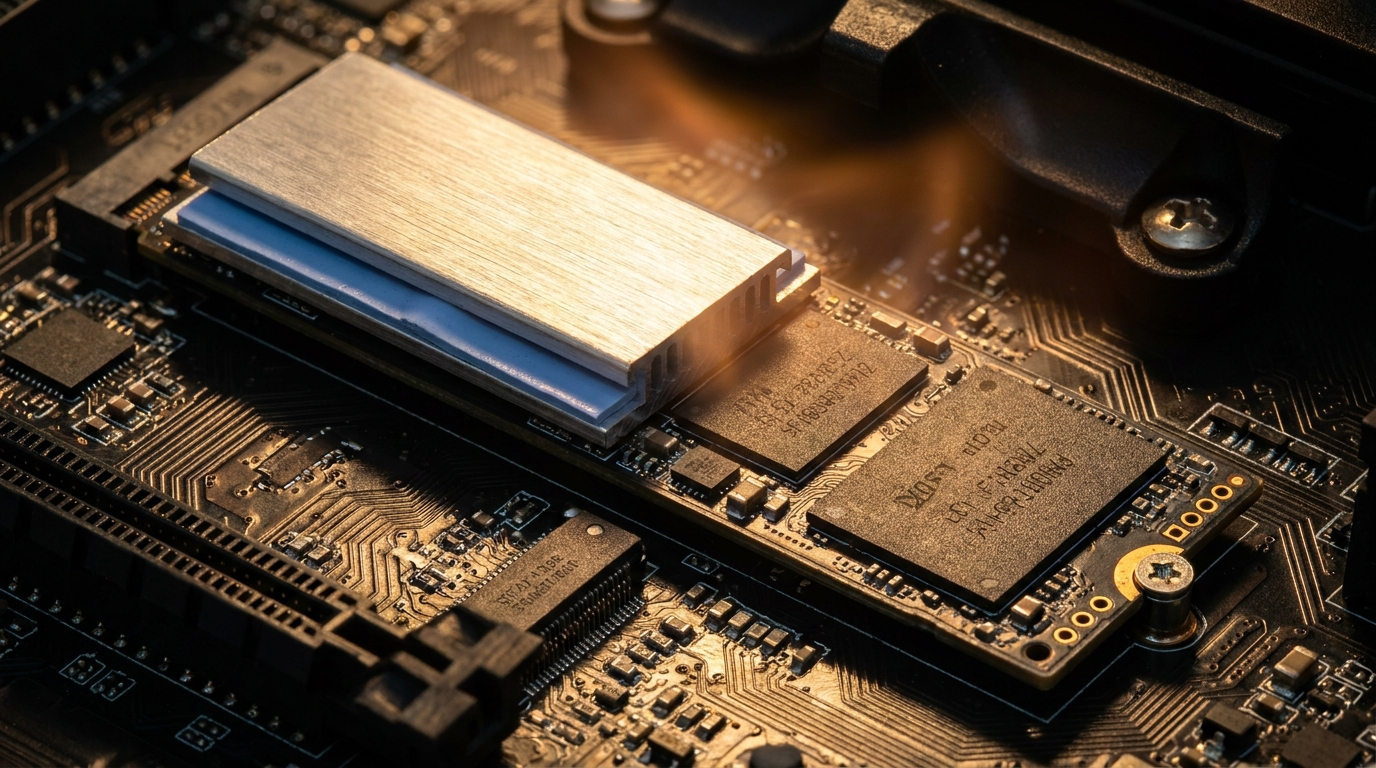
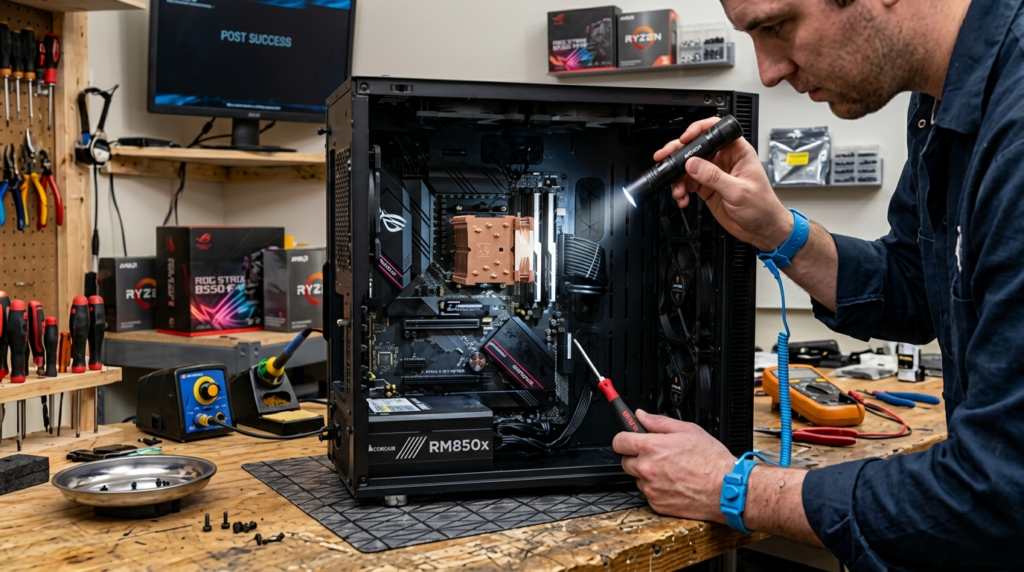
Method 5: Read the board itself (desktops only)
Sometimes the lowest-tech method is the surest. On a desktop, the model is silk-screened directly onto the PCB. Manufacturers usually print it in a large font near the CPU socket or between the PCIe slots — look for text like “B550 AORUS ELITE” or “PRIME Z790-P.”
Power the machine down fully, pop the side panel, and bring a flashlight. Don’t confuse the model with the chipset name (more on that distinction shortly) or with the long serial-number sticker, which is a different thing. This is the method to fall back on for a dead PC that won’t POST — when no software can run, your eyes still can.
On a laptop, skip this. The model is rarely printed on the board, opening the chassis risks your warranty, and you’ll get the info faster from the methods above or the laptop’s own model number.
Method 6: The box, the manual, the receipt — and trusted apps
If you built the PC yourself and you’re a person who keeps boxes, the motherboard model is printed in big letters on the carton, along with the socket, chipset, and form factor. The manual cover shows it too. No box? Your order history or emailed receipt almost always lists the full product name.
When the built-in tools come up short — those “O.E.M.” placeholders again — a couple of free utilities read deeper into the hardware:
- CPU-Z — the community favorite. Open it, click the Mainboard tab, and you get manufacturer, model, chipset, southbridge, and BIOS version on one screen. Tiny download, no nonsense.
- HWiNFO — heavier, more detailed. Your board’s make, model, and chipset sit in the main window, alongside sensors for temperatures and voltages.
- Speccy and Belarc Advisor — both generate a full system report; look under the motherboard or “Main Circuit Board” heading.
Stick to the official sources for these (cpuid.com for CPU-Z, for example). Random “system info” downloads are a classic vehicle for bundled junk.
Which method should you use? A quick comparison
No single method wins every time. Here’s how I’d pick, depending on your situation:
| Method | Best for | Speed | Catch |
| System Information | Most Windows users | Fastest | Can show “O.E.M.” on prebuilts |
| Command Prompt (WMIC) | Older Windows installs | Fast | Gone on Windows 11 24H2+ |
| PowerShell (CIM) | Any modern Windows | Fast | Command looks intimidating |
| BIOS / UEFI | PCs that won’t boot Windows | Medium | Fiddly key timing |
| Physical board | Dead desktop PCs | Slow | Desktop only; needs opening |
| CPU-Z / HWiNFO | When tools read blank | Fast | Requires a download |
Model vs. chipset vs. socket vs. serial number
This is the bit most guides skip, and it causes more confusion than any command ever could. Four different things get mixed up constantly:
| Term | What it means | Example |
| Model | The board’s specific product name — what you search to download BIOS/drivers | ROG STRIX B650-A |
| Chipset | The feature set the board is built on; hints at CPU compatibility | B650, Z790, B760 |
| Socket | The physical slot the CPU sits in | AM5, LGA1700 |
| Serial number | A unique code for your one physical board, used for warranty | Long alphanumeric string |
| Version / Revision | The hardware revision of that model (rev 1.0 vs 1.1) | Rev 1.xx |
Why it matters in practice: you need the exact model to grab the right BIOS file. You only need the chipset and socket for a rough “will this CPU fit?” gut check. And the serial number is useless for compatibility — it’s purely for warranty claims and asset tracking. Mixing these up is how people end up flashing the wrong firmware.
Laptops and prebuilt PCs: the awkward cases
Laptops don’t really have a “motherboard model”
Laptop boards are custom-shaped for one specific chassis and aren’t sold separately, so there’s no consumer model name like a desktop has. For a laptop, the motherboard effectively is the laptop model. If you’re checking compatibility for a RAM or SSD upgrade, look up your laptop’s model number — it’s on the bottom sticker or in the BIOS — and feed that into a tool like Crucial’s System Scanner, which tells you exactly what memory and storage fit.
This is also why the upgrade conversation is so different for portables versus desktops, and part of what we dig into when comparing a Chromebook vs a laptop — the less a machine lets you change, the more the original spec decides its whole lifespan.
“To be filled by O.E.M.” and weird code names
On big-brand prebuilts — Dell, HP, Lenovo — the BaseBoard Product often shows a cryptic internal code (something like 0W7NK6) or the dreaded “To be filled by O.E.M.” instead of a clean name. The board is real; the maker just didn’t program a friendly label into the firmware. Two ways forward: search that exact code on the manufacturer’s support site, or skip the board entirely and look up your full system model number (Dell calls it a Service Tag, HP has a serial/product number) to reach the correct drivers and manuals.
Checking on Mac and Linux
macOS (logic board)
Macs use a logic board instead of a standard motherboard, and Apple doesn’t expose a retail model name. The workaround is the serial number:
- Click the Apple menu and choose About This Mac.
- Copy the Serial Number (or open System Report for more detail).
- Paste it into a reputable lookup service such as EveryMac to reveal the logic board part and the exact configuration.
Linux
One terminal command does it. Open a terminal (Ctrl+Alt+T) and run:
sudo dmidecode -t baseboard
Enter your password and you’ll see Manufacturer, Product Name, and Version under Base Board Information. The older form sudo dmidecode -t 2 pulls the same data if you’ve seen it written that way.
Common mistakes people make
- Copying the WMIC line onto a brand-new Windows 11 PC. It’s deprecated; use the PowerShell CIM command instead and save yourself the “not recognized” error.
- Treating the chipset as the model. “I have a B650” tells a store almost nothing — dozens of boards share that chipset. Give them the full product name.
- Reading the serial number as the model. The long sticker code is for warranty, not for finding drivers.
- Opening a laptop hunting for a board name that isn’t there. Use the laptop model number instead, and keep your warranty intact.
- Trusting a sketchy “driver finder” site. Once you have the model, download firmware and drivers only from the manufacturer’s own support page.
- Panicking at “To be filled by O.E.M.” It’s a missing label, not a broken board. CPU-Z or the BIOS will usually fill the gap.
Expert tips from the workbench
- Screenshot the result. Once you’ve got the model on screen, snap it. You’ll want it again the next time you shop for parts, and it saves repeating the whole exercise.
- Match the BIOS version too. While you’re in System Information or PowerShell, note the BIOS version. When you visit the support page, you’ll instantly see whether a firmware update is waiting.
- Find the QVL before buying RAM. Search “[your model] QVL” — the manufacturer’s tested-memory list is the closest thing to a guarantee that a kit will boot at its rated speed.
- Cross-check with two methods on prebuilts. If System Information is vague, confirm with CPU-Z. Agreement between two tools beats trusting one blank field.
- Keep a plain-text spec file. A two-line note with your board model and BIOS version, saved somewhere you’ll find it, pays off every upgrade cycle.
Frequently asked questions
How do I check my motherboard model in Windows 11?
Press Windows + R, type msinfo32, and press Enter. On the System Summary screen, read BaseBoard Manufacturer and BaseBoard Product for your board’s make and model. If those fields show “O.E.M.,” use PowerShell’s Get-CimInstance Win32_BaseBoard command or the free CPU-Z app instead.
Can I check my motherboard model without opening the PC?
Yes — in almost every case. The model is stored in firmware, so Windows System Information, PowerShell, the BIOS, or a tool like CPU-Z can read it without removing a single screw. You only need to open the case if the PC is dead and no software will run.
Why does the WMIC command no longer work?
Microsoft has deprecated WMIC and disabled it by default on newer Windows 11 builds (24H2 and 25H2). If you see “‘wmic’ is not recognized,” that’s expected. Use the PowerShell command Get-CimInstance Win32_BaseBoard, which is the modern, supported replacement.
What’s the difference between motherboard model and chipset?
The model is the board’s specific product name (like ROG STRIX B650-A) and is what you use to download BIOS and drivers. The chipset (like B650 or Z790) is the feature platform the board is built on and only gives a rough idea of CPU compatibility. Many different models share one chipset.
My motherboard model shows “To be filled by O.E.M.” — what now?
It means the assembler never wrote the model name into the firmware. The board still works. Try the BIOS screen or CPU-Z to read it, or look up your full system/PC model number (such as a Dell Service Tag) to reach the right support page.
How do I find the motherboard in a laptop?
Laptops don’t have a separate, named motherboard model — the board is unique to that laptop. Instead, find the laptop’s model number on its bottom sticker or in the BIOS, then use a tool like Crucial’s System Scanner to check which RAM and storage upgrades are compatible.
Do I need administrator rights to check my motherboard?
No. Both System Information and the PowerShell CIM command run fine without admin privileges on your own machine. You only run into permission prompts when querying remote computers or making firmware changes in the BIOS.
What’s the fastest free tool to identify my motherboard?
CPU-Z is the quickest free option when built-in tools fall short. Download it from cpuid.com, open it, and click the Mainboard tab to see the manufacturer, model, chipset, and BIOS version on a single screen.
How do I check my motherboard model on a Mac?
Macs use a logic board with no public model name. Open the Apple menu, choose About This Mac, copy the serial number, and enter it into a lookup service like EveryMac to find the exact logic board and configuration.
Is the serial number the same as the model number?
No. The model number (e.g., PRIME B760-P) identifies the type of board and is what you search for drivers. The serial number is a unique code tied to your one physical unit, used for warranty and registration. They’re not interchangeable.
Final verdict
Finding your motherboard model is genuinely a two-minute job, and the screwdriver stays in the drawer for all but the rarest cases. For most people on Windows, msinfo32 answers the question on the first try. Keep the PowerShell CIM command in your back pocket for newer machines where the old WMIC trick has quietly disappeared, lean on CPU-Z when a prebuilt hides behind an “O.E.M.” label, and save the BIOS or a flashlight for a PC that refuses to boot.
The one habit worth building: once you’ve got the model, write it down somewhere permanent along with your BIOS version. Every future upgrade, driver hunt, and troubleshooting session starts from that single piece of information — and you’ll never have to go digging for it twice.

For more plain-English hardware and troubleshooting walkthroughs, browse the rest of our How-To Guides over on CripsyWire.

Continue Reading on CripsyWire
For more practical tutorials and hidden features, see our full how-to guides section. AI workflow guides feed into the broader AI tools and agents coverage, phone tricks live in smartphones, and wearable setup walkthroughs in wearables. When you are deciding what to buy, the reviews and comparisons section helps. All part of CripsyWire Tech, and the homepage shows what is newest.